Do Not Take Your Furniture For Granted
Let’s say you have just bought a brand new home, and you have to decorate it from scratch. What should you begin with? Nine out of ten people will choose their furniture first. And it is only reasonable – after all, furniture is the easiest way to create comfort and make a statement about your style. Can you imagine your house or apartment without the living-room set, the comfy reading armchair or the large dining table?
Why, then, would you not have the same attitude when it comes to furniture cleaning? Be honest, it is not even remotely close to your housekeeping chore list – you will put the toilet, kitchen, or your teenage son’s room first. Taking your furniture for granted is a major mistake many people do. Before you know it, the stains will creep in, your sofa will look shabby and discoloured, the wooden handles of your chairs will look their shiny gloss.
There is a silver lining, though – you can keep your beloved armchairs, ottomans, and sofas in perfect condition for a much longer time, if you follow a few simple guidelines. And we, being the generous and cool guys that we are, will share them with you right away!

How To Clean Upholstered Furniture
Your number one priority when it comes to upholstered sofas and armchairs is to choose the proper cleaning material. There are several products available on the market, depending on the fabric and the level of dirt which you need to remove. There are also special detergents for removing different kinds of stains that help maintain the upholstery in a reasonable condition.
Some people prefer to use a product which they prepare themselves. For example a mixture of laundry detergent, soap and warm water is an effective combination. You can rub the solution into the upholstery fibres – treat all the stains and spots as many times as required until they become completely invisible. Should you have any doubts that this solution might not be suitable for your type of fabric material, test on a small area on the back side of the sofa and if it is fine, proceed with the whole area.
After you have successfully washed your sofa, rinse it profusely to remove the dirty soapy water. The best way to do the rinsing is to use of a sponge. Repeat as many times as needed until the sofa is completely clean. If you want to speed up the drying process, you can either use a towel to wipe down the upholstery or use a hair dryer. You should open the windows in the room which will help for the fresh smell of the sofa. With this method of cleaning, all bad smells and cigarette smoke odour will be gone and your furniture will be again the best place to relax at your home.
Tips For Cleaning Suede Upholstery
Suede upholstery not only looks great, but is also extremely soft and comfortable, which makes it such a popular upholstery material. However, it is more delicate than normal leather and requires special care to keep it looking good for years.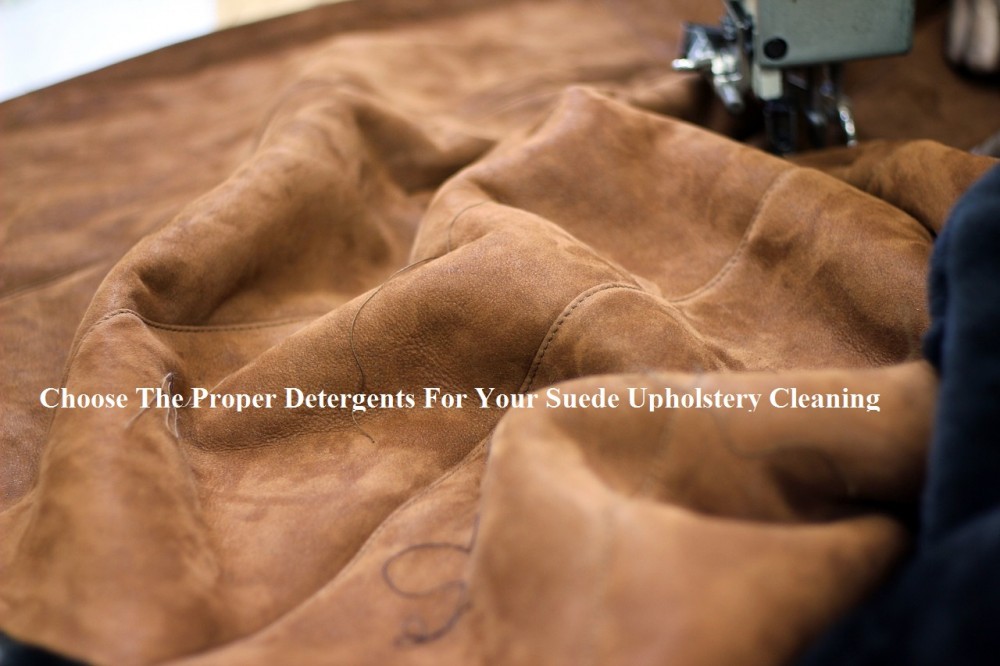
Even if you book a domestic cleaning agency to clean your house and your upholstery regularly, keep in mind that suede absorbs liquids and other kinds of stains more than normal leather. If you get a stain on such a surface, it is best to clean it up immediately before it gets ingrained in the material, instead of waiting for your house cleaner to come and take care of the issue – it may be too late by then.
You should blot all stains with a clean white cloth or paper towel. Never rub the stain as this will push it deeper into the fabric.
Do not use any cleaning fluids or sprays that are not specifically designed for use on suede. They could damage the finish of the material.
You can try removing small spots or stains by using a clean art gum eraser to rub the stain away. But never rub too hard and if the eraser does not seem to be having any effect, stop immediately.
It is advisable not to try to remove major stains or spills from suede yourself, you could do more harm than good. It’s safer to call in your domestic cleaning agency for a special job or a profession leather cleaning expert to do the job.
Never try and scrape away any coagulated dirt from suede. You could scrape off the nap along with the dirt.
Beside stain removal, regular brushing of the suede will increase its life. Here are four easy steps for doing it:
Use a soft napping brush and suede cleaning cloths that are available from furniture shops to brush away dirt. A good brushing once a week should be fine.
Move the brush and cloth in different direction so as to clean all sides of the nap and ensure that dirt is not being forced into one side.
After brushing the suede, run a clean dry sponge over the surface to give the nap an even look.
Ask your house cleaning agency to recommend a good water-proofing agent to keep the suede clean between the periodic treatments.
How To Clean Leather Furniture
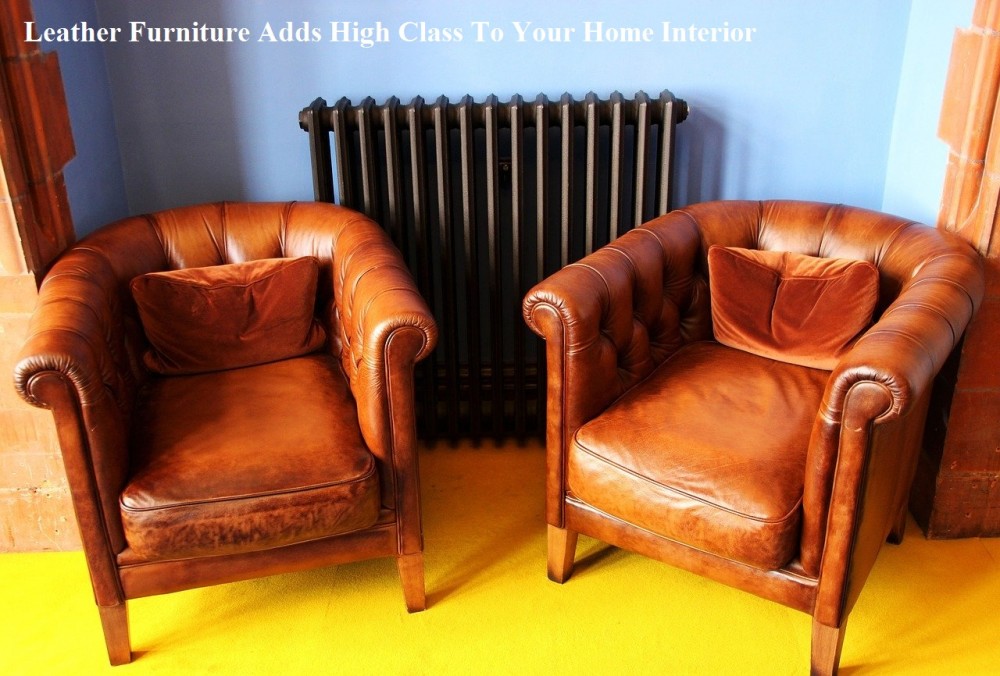 It is no surprise that leather has become synonymous with high class and top quality as far as furniture is concerned. Leather couches are among the most preferred interior design items, as they are stylish, modern and longer-lasting than the fabric ones. As any other item at home, however, they require regular and proper care to preserve their beauty.
Leather upholstery is working best for families with children or for commercial buildings or public establishments (like banks, for example), where many people sit on them every day. Spillages could be easily wiped down with a cloth and there will be no visible traces from them. Leather is also more health-safe because it does not absorb dust and dust mites while fabric upholstery does. Having said all that, leather couches and armchairs do require regular maintenance, and you have to options to perform it – book a professional upholstery cleaner London or try to effectively do it on your own. If you choose the latter, here is what you should keep in mind.
How to clean a leather couch?
With the help of a regular vacuum cleaner and the soft brush attachment, vacuum any food bits and pieces from the couch. Prepare your own leather cleaning product by mixing a mild soap with warm water, and wipe the coach down with a cloth damped into the mixture. Using another cloth and clean water, rinse the couch by wiping it gently. To dry the leather, use a dry cloth or a towel and wipe down every single drop of water to avoid leaving streaks.
How to maintain a leather couch?
After cleaning the couch, it is essential that you apply a conditioner or a leather protector. It will replenish the leather with natural oils which protect the leather from cracking. It will also make it shiny and look like brand new.
How To Clean Wicker Furniture?
Wicker furniture adds charm and character to a room, but it is also a dust magnet, and is generally hard to clean because of the characteristics of the material. Do not despair, though – wicker furniture can be cleaned at home  without damaging it. Weekly or at least twice monthly dusting will help to keep the chairs looking good and fairly dust-free. You will not need anything outlandish for the maintenance – an old toothbrush, a vegetable brush, or paint brush will do the job just fine.
Before cleaning your wicker furniture, you must determine the type of material used. There are four main types of wicker furniture:
Rattan: can take some amount of moisture, but excessive wetting can cause warping.
Bamboo: although bamboo can be washed, it too needs to be dried before using. This type of fibre is especially susceptible to mildew.
Reed
Paper fibre: the most delicate fibre
One quick glance at the list above will convince you that you cannot clean all four types the same way. First, start off by using compressed air – a hair drier or a vacuum cleaner – to blow off excess dust. It is also a good way to penetrate crevices and remove dirt and other particles.
Never use excess water on wicker furniture as most types cannot withstand too much moisture, especially those made of paper fibre – it is best cleaned with a damp rag. You can treat all other types of wicker with a solution of mild soap water (one tablespoon dishwashing or gentle liquid detergent to one gallon water). After washing with soapy water, rinse with tap water, and finish off by placing in the sun to dry. Alternatively, the furniture can be dried by placing in front of a fan. To maintain the quality of the weave and the shape of wicker, never use your wicker furniture until it is completely dry. Do not use anything to push the weave apart when cleaning the furniture; this may result in gaps when the fibre dries.
Since the fibre used to build wicker furniture is natural, it may attract mould. However, a mild solution of chlorine bleach will remove the mildew – just leave it to absorb for a few minutes. Apply a thin layer of polish to the furniture after it has dried. Under normal circumstances, wicker furniture takes between two to three days to dry properly, but sometimes it may take longer depending on weather conditions and how wet it got.
To keep wicker looking good and to maintain their life for years, clean thoroughly at least twice per year. Painted wicker furniture, however, should not be washed as this will destroy the finish. Although cleaning wicker is hard work, the beauty they add to your home is more than worth the elbow grease.
Note: Do not get any wooden parts of the furniture wet as this may lead to warping and peeled varnish.
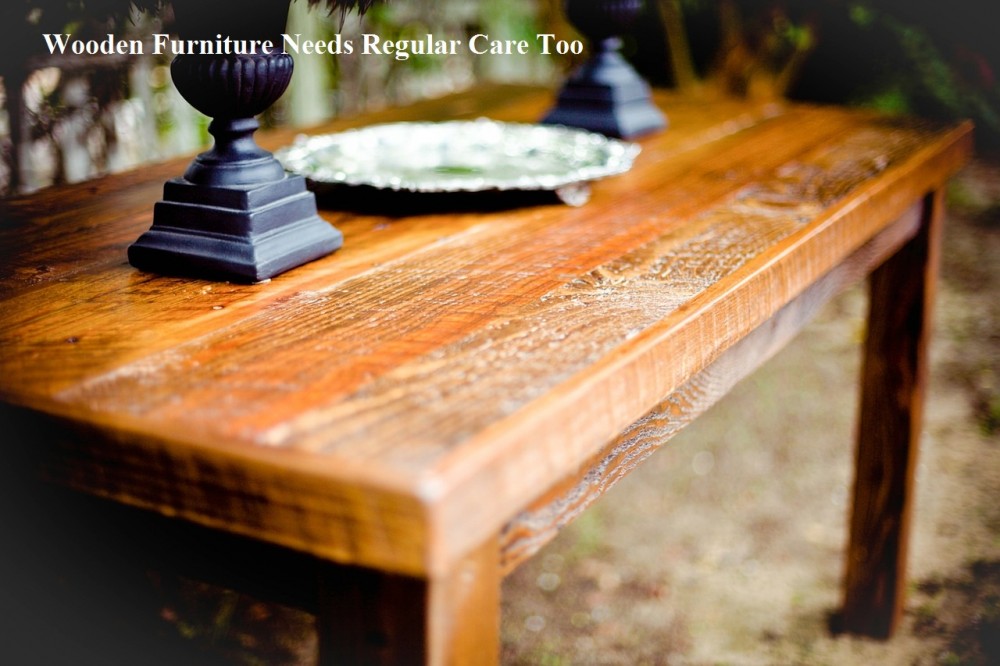
The Greatest Challenge – Cleaning Wooden Furniture
It does not matter what type of wooden furniture you have – it should be cleaned and cared for in more or less the same way. Most wooden objects will have some sort of sealant or polish on them to prevent them from being damaged or rotting with damp. Some of these treatments discolour when wet; others, such as polyurethane, don’t seem to be too badly affected, if at all. Most wood finishes react negatively to hot objects being placed directly on them – or even through a tablecloth. If you are likely to use a wooden surface for resting hot cups of tea (e.g. a bedside cabinet if you like having a cuppa in bed first thing in the morning or last thing at night), then make sure that you have plenty of coasters or mats handy to protect the wood. Some objects should never be used for resting containers for liquid or hot items, especially those with French polish. Be careful with pot plants – the little dishes or trays inevitably overflow.
 However, don’t be fooled into thinking that a bone-dry environment is ideal for wood. Wood will warp if it gets too dry – this is particularly undesirable for pianos (and other wooden string instruments such as guitars, cellos and violins). Wood will swell if it gets too wet, which can cause drawers to stick – I have this problem in my kitchen every winter when the damp increases.
Dusting is the main form of cleaning necessary for all wood furniture. Use a soft cloth for dusting rather than a feather duster, especially on high-gloss finishes such as French polish, as broken quills can scratch the fine finish. Damp cloths are OK for use on less delicate wooden furniture, and this can be a very effective way of trapping all the dust. Using lace doilies and the like can cut down on the amount of visible dust (the dust seems to become trapped in the cloths) and can look very effective against wood.
Dusting is all that you need to do for French polished furniture, but wooden furniture with a lower level of gloss will need a touch-up of polish now and again. You can use wax-based, oil-based or any cream/liquid polish, depending on your own preferences for things such as smell or origins (linseed based and beeswax based polishes are more environmentally friendly on the whole). Apply the polish with one cloth, then let it dry before buffing with another cloth. Layer after layer of polish can darken the wood. If you wish, you can remove old layers with a solution of vinegar and warm water applied sparingly and dried off before applying fresh polish. Solid wood is better than veneers when it comes to chips or scratches. With solid wood, all you have to do is sand it down lightly until the crack disappears (use fine sandpaper) then reapply polish (this won’t work for French polish, which should be treated like a veneer). With a veneer, however, you will have to disguise the chip or scratch. Using shoe polish in a matching shade to the finish can work, as can colouring in the lighter patch with a wax crayon or even a felt tip pen. Or else, cover up the scratch with a doily or throw, or even keep the item in a dark corner where the scratch isn’t obvious.
When it comes to regular everyday cleaning for wood – say the weekly going-over in the bedroom – it isn’t necessary to polish wood every time. Often, just dusting with a damp rag (not wet) will be enough to keep the wood looking at its best. Realistically, you only really need to polish wood furniture once or twice a year – as part of a spring cleaning session, maybe. However, if you have to polish wood furniture that has been getting a bit dry and neglected (you’ve just inherited it from your grandmother, maybe) then you can dab your cleaning cloth/duster with a tiny bit of linseed oil – just enough to moisten the rag – before going over it.
If somebody has neglected the wood furniture or got it grimy somehow, you can make your own wood cleaner by mixing about ½ a cup of lemon juice or vinegar with about a teaspoon of soap gel and a few drops of essential oil. Shake together in a bottle, then spray directly onto the wood. Give it one good buff-up with a clean damp cloth, then rinse off the gunge and residue with another.
When the time comes to polish wood, you can make your own natural wood polish by just using plain linseed oil, like a cricketer oiling his/her bat. Add some essential oil if you like. But the real old-fashioned wood polish is made as described below. It’s sort of natural, but not quite, thanks to the turpentine, unless you can get hold of vegetable turps rather than the mineral sort. You can also use an organic substitute made from citrus peel – hunt around to find this.
Wood polish:
100 g grated beeswax (save candle-ends if you’re feeling thrifty)
2 ½ cups turpentine
2 cups water
½ cup lemon juice or vinegar (if you plan on polishing dark wood, you can use malt vinegar instead of the usual white vinegar used as a natural cleaning products)
60 g grated soap
15–20 drops essential oil – cedar, lemon and lavender are popular choices for wood polish.
Melt the beeswax in a double boiler or in a microwave on Low power. While the beeswax is melting, melt the soap in the vinegar and water. When the wax is runny, remove from the heat and very carefully add the turpentine. If you’re not using natural vegetable turps, then make sure you don’t breathe the fumes in. Then carefully add the vinegar/water/soap mix. Stir like crazy, then add in the essential oils. Store in an airtight screw-top jar. Let it cool before putting the lid on.
Ten Quick Tips For Cleaning Wooden Furniture
Most wooden furniture can be cleaned with a bit of warm soapy water and a damp cloth. The only exception is wood that has been finished with something other than polyurethane or hasn’t been finished at all. Use a mild soap of the sort you use for washing hands rather than a harder laundry soap.
Never use the method described above for French polished wooden furniture – this has not been treated with polyurethane! Dust frequently to keep it shining and keep water well away. If you really need to, use straight beeswax to polish it. Dust before you polish. Just rub the beeswax straight onto the wood, then buff with a soft cloth. You can use the same method for putting a gentle shine on your fingernails, if you want to.
Untreated wood can be cleaned with a home-made polish of blended oil (use olive oil or some other vegetable oil – the cricketer’s favourite, linseed oil, is a winner) and a little white vinegar. Add essential oil if you like. As usual, apply with a soft cloth and buff with another one.
When you dust, make sure the cloth is slightly damp. This will trap the dust and take it away rather than merely pushing it along, which can possibly scratch the wood surface. Remember to rinse out the duster frequently. Feather dusters of the old-fashioned sort work well.
Very special wooden items should be kept out of direct sunlight, as UV rays will attack the finish on the wood. The UV will also bleach the wood. However, this may be an advantage for lighter coloured unfinished items.
Very special wooden items should not be allowed to become too dry. This can become a problem with items in modern homes with excellent ventilation, heating, dehumidification and all the rest of it. An old musician’s trick is to put a jar of water inside an upright piano to provide it with the moisture the wood needs. Special hydrators (try a good music shop) can also be used inside cases for guitars, violins and the like. Keeping up regular damp-dusting also works, to a certain extent. Also keep wooden furniture away from strong dry heat, or even in a special room that isn’t dried to desert-like conditions.
If dark wood gets scratched, hide the mark by dabbing on iodine, instant coffee mixed with vegetable oil or a brown wax crayon. Simple but very effective!
If you have an old-fashioned Scandinavian style raw pine kitchen table, don’t use boiling water to scrub it down unless you want the wood to turn slightly yellow. Scrub it with cold water and soap. However, boiling water is a very effective sterilizer and you may consider this factor worth a bit of yellowing. You can always counteract the yellowing effect, dry the table and sterilize the table even further by putting the table in strong sunshine for a bit and letting the UV rays do their thing.
You do use coasters on coffee tables and other tables to protect the finish, don’t you? One trick used by friends of this writer is to get a piece of glass cut to fit over the top of the wood. No problems with heat marks, everyone can see the wood and it’s a breeze to clean.
Linseed oil can be applied to any wooden furniture to nourish it and to help seal in moisture so it doesn’t dry out too much. Apply sparingly to clean, dry furniture. Sports shops are good places to find linseed oil.